by Noah Chase
At one time in Ireland, the average adult consumed over six kilos of potatoes per day or just over two tons per year! If you consider there were over eight million people eating this staple food, it is estimated that over 330,000 hectares were cultivated to grow this amount of potatoes. These were not the varieties that we are familiar with today but mostly the dreaded Lumper variety described as “wet, tasteless and unwholesome” potato variety that triggered the Irish ‘Potato’ Famine. Today about 9000 hectares are grown (producing an impressive 370,000 tons) and our average annual potato consumption is just 85kg a person, which is still two-and-a-half times higher than the world average. Despite this you may be surprised to learn we still import over 50 per cent of the potatoes consumed in Ireland.
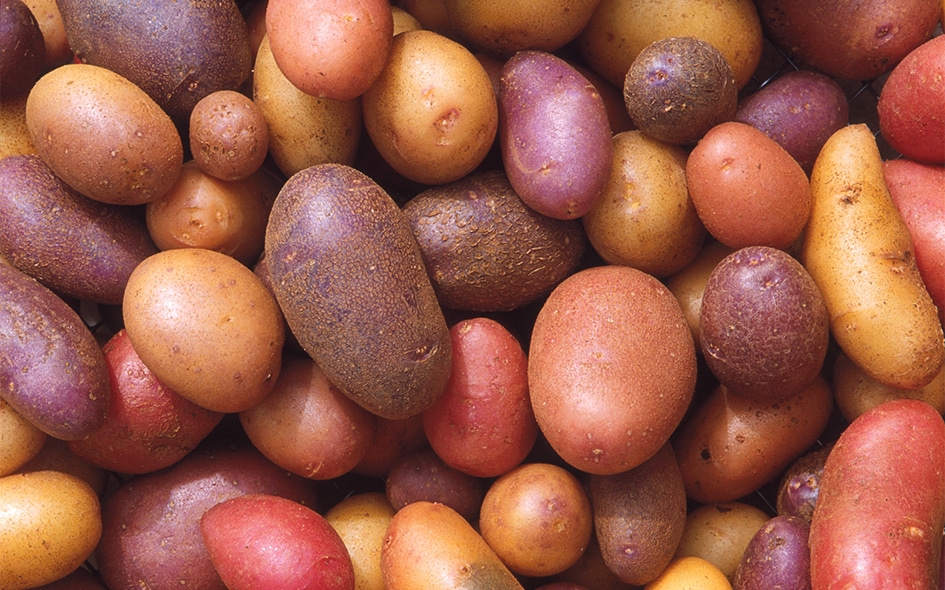
We have ideal growing conditions in West Cork and we are finding many of our customers here at Deelish are getting fantastic returns on their home grown spuds! This season we have over 20 varieties in stock. Each year we try to source new varieties, as well as stocking tried and tested favourites such as Roosters and British Queens. For this month’s article, I thought it would be a good idea to have a look at how to grow your own.
There is plenty of time to plant this wonderful vegetable, which is traditionally planted on St.Patricks day but can also be planted as late as May.
Seed potatoes are dived into three main groups listed below:
First earlies; Plant early to mid March. 10-12 weeks to mature. Less chance of blight but smaller harvest. Popular varieties; Orla, Duke of York, Sharpe’s Express, Home Guard
Second earlies; Plant mid March to early April. 12-14 weeks to mature. Small chance of blight. Good selection Medium harvest. Popular varieties; British Queens, Charlotte, Nicola. Maris Peer
Main crop; Plant in April. 18-22 weeks to mature. More chance of blight. Large harvest. Popular varieties; Rooster, Golden wonders, Kerr’s pink, Sarpo Mira.
Chitting
Once you have decided which varieties you want to grow, it is time to ‘chit’ (spelled with a c)! Seed potatoes, particularly earlies and second earlies benefit from ‘chitting’ prior to being planted. This process encourages strong shoots to sprout over several weeks to encourage faster growth and heavier crops once they’re in the ground.
From late January/February, chit your seed potatoes by setting them out in seed trays, shallow boxes or empty egg cartons in a cool, bright, frost-free position to allow them to sprout. You will notice that the immature ‘chits’ are all at one end (called the rose end). Place the rose end upwards. Sturdy ‘chits’ will form and should grow one inch in length. Be careful not to let them get any longer, as they can break when planting out, slowing down the growth. Main crops don’t necessarily need to be chitted.
Planting out
Once you are happy with your chitted seed potatoes and the weather seems right, you are ready to plant! Here in West Cork, it is possible to plant seed potatoes right through the year under the protection of glass houses and polytunnels. Outside it is possible to plant out after the last frost, (typically mid to late March). The soil should be freshly dug over and weed free.The traditional way is to dig a narrow trench 12cm (5in) deep. This can be lined with compost or even grass clippings for a better crop. As potatoes are hungry growers, I also add organic horse manure or chicken pellets, as well as seaweed to the trench at this stage. The seed tubers are spaced 30cm (12”) apart for earlies and 37cm (15”) for main crop varieties. The rows should be 24” (60cm) apart for earlies and 75cm (30in) apart for maincrop. Planting depth is also important, as if they are planted too shallow they are unlikely to produce large tubers and too deep they will struggle to grow at all. The ideal planting depth is just over 4-5” (10-13cm) depending on the size of your seed potatoes.
There are other ways of growing if you do not have a large garden, or any garden at all! Small crops of potatoes can be grown in large, deep containers (rubble sacks and stacked tyres also work) and this is a good way of getting an early batch of new potatoes. Line the bottom 15cm (6in) of the container with potting compost and plant the seed potato just below this. As the new stems start growing, keep adding compost until the container is full.
Aftercare
It is important to ‘earth up’ potato crops as the shoots emerge above ground, to protect them from frosts which blacken the shoots and delay production. Simply draw some soil over the top of the shoots to cover them again.
If there is a chance of a late frost, cover the new shoots with a garden fleece or straw. Remove when the threat of frost has passed.
First earlies and second earlies in particular require plenty of water during prolonged dry weather especially when tubers are starting to form. This is also a good time to feed with an organic liquid concentrate. This will strengthen the plants against disease and improve yields.
When the stems reach a height of 23cm (9”) above ground they should be earthed up again to prevent tubers near to the soil surface from turning green.
Weed out any unwanted plants along the trenches through the season (if the potatoes are growing well, there won’t be many).
Harvesting
Harvesting times will vary depending on the growing season, weather conditions at harvest time and the size of tuber you want. Start to harvest first earlies as ‘new potatoes’ when the plants begin to flower, approximately 10-12 weeks from planting. Tubers will generally become larger the longer their growing period.
Maincrop varieties are usually left for at least two weeks after the leaves and stems have withered, to allow the skins to set. Cut down the stems with secateurs to just above soil level as the leaves wither and yellow, or if they show signs of blight. After harvesting, leave the tubers on the soil surface for a few hours to dry and cure the skin. Once dry store them in paper or hessian sacks in a dark, cool but frost free place. Avoid storing in polythene bags as potatoes will ‘sweat’ and rot. Some main crop varieties tend to taste sweeter a few weeks or months after harvesting, as the starches change to sugar.
Common problems
Potato blight: This is the most common disease in our wet, warm summers. The initial symptoms are a rapidly spreading brown watery rot, affecting the leaves, and stems. Tubers can be affected too, and have a reddish-brown decay below the skin, firm at first but soon developing into a soft rot.
Remedy – Spray potato crops with a protective fungicide even before signs of blight become apparent. Copper sulphate is used as a preventative, not a cure. Add 50g Bluestone (copper sulphate) to two litres of hot water. In a separate container add 60g washing soda to three litres of hot water. After half an hour, mix the two liquids and spray directly onto the potatoes, making sure to spray under the leaves as well. Do not spray if raining, as the mixture will not stick. Use a watering can in the absence of a sprayer and ensure to clean it thoroughly after use. This five litre mixture is enough for 20 square metres. Begin spraying this potato blight treatment from about June, particularly when periods of wet weather are forecast and spray again after a few weeks to protect any new growth.
We have also had great feedback from gardeners spraying with horsetail concentrate available as a concentrate here at Deelish. If plants do become infected they should be removed and destroyed. Where potato crops have already developed tubers then these can be saved by cutting away the foliage and stems. Leave the soil undisturbed for 2/3 weeks to kill off any lingering spores so that they don’t infect the crop when it is lifted.
Always try and grow potatoes on new ground or rotate every year if possible. Keeping the potatoes fed with a good organic fertiliser containing plenty of trace elements will also help with preventing blight.
If you want to grow main crop potatoes but worry about blight, another option is to grow any of the following; Sarpo Mira, Axona along Vitabella (one of my favorites) as well as many more varieties have all been bred for high blight resistance.
Potato blackleg: Potato blackleg is a common bacterial disease which causes black rotting at the stem base. Initial infections cause stunted growth and yellowing stems. If tubers form, the flesh may be grey or brown and rotten.
Remedy – Blackleg generally infects individual plants rather than entire crops and does not spread between plants or persist in the soil. Remove and destroy any infected plants, improve soil drainage and plant blackleg resistant potato varieties such as Charlotte.
Potato scab: This disease causes raised scab-like lesions on the potato surface. It does not affect the taste of the potato, and is easily removed on peeling.
Remedy – Common Scab on potatoes is best controlled by improving poor soil conditions with the addition of organic matter and by keeping potato crops well watered throughout the growing season. Use any infected tubers first and do not store them. Home guard is well known variety for scab resistance.
Eelworm: Initially, crops display patches of poor growth and affected plants may show chlorosis and wilting, with poor top growth. These symptoms develop from the ground upwards. Heavily infested plants die prematurely and yield a poor crop of under-sized tubers.
Remedy – There are no pesticides available to home gardeners, which will control eelworms, and so crop rotation should be used to avoid spreading the pest and to reduce infestations. Some varieties are more resistant. Nicola (another of my favourites) and Picasso have good Eelworm resistance.
Slugs: Slugs cause damage to both the foliage and to the developing potato tubers. Damage is fairly obvious as the culprits are easily identified by the silvery slime trails that are left around the plant foliage and on the soil surface.
Remedy – There are a multitude of ways to kill or remove slugs and snails including homemade remedies such as beer traps. Use eco-friendly slug pellets or you can try nematodes or copper barriers. Sarpo Mira, Golden wonders and a few others have good slug resistance.
One of the attractions of growing the humble potato is just how easy it is to grow, and how much you get in return for a bit of planning, chitting and digging! It is also an excellent crop to grow on new ground where you plan to grow other vegetables in future seasons. Don’t let any of the above common problems put you off giving them a go, as they really are a joy to grow!
Feel free to visit us here at Deelish for all your gardening needs and many more gardening tips. Wishing you all the best with the 2026 growing season ahead.